Showing posts with label auntie says. Show all posts

Tuesday, 20 January 2026

Moving moving! - Part II

I just realised that I didn't publish this back in May 2025 after writing Part I in April!! Argh, here goes...

Part II is on what happens in the new house, i.e. cleaning and unpacking.

Cleaning

I don't remember cleaning our first matrimonial home before moving in, despite moving in twice. First time, maybe I wasn't so OCD yet? Second time, I was heavily pregnant and my in-laws who lived there while we were in Evanston kept it clean.

For BP in 2018, it was minimal renovation since the new apartment came with lots of fittings already and the ID cleaned up very well. I might have assigned our helper to clean while I was working. For our current place, though, it was a nightmare.

First, we had a short timeline between handover and moving in. And while cleaning, we discovered things that needed rectifications so we had to repeat cleaning of some areas :(

Below in recommended order to prevent accumulation of more dust on already cleaned areas:

Windows
  • Plenty of reno dust, especially between the windows and the grilles. Prepare a vacuum or blower. We found that our mini blower is stronger than our mini vacuum for stuck debris.
  • For wet cleaning of the glass, prepare a squeegee, a spray bottle and plenty of rags for mopping up at the bottom following the squeegee - I always have rags, i.e. cut-ups of old clothes, for cleaning.
  • Sliding windows trap more dirt than casement windows as some parts are just not accessible! For those facing outside the building, be careful when leaning out to clean the outside part of the glass! Actually, unless there's bird poo, no need to clean la :p
  • Don't forget the windows in the toilets! Ours are louvre. Over time, heat from showers and dust combine to form a gross coating on the glass facing upwards... This needs a dry wipe before a wet mop.

Aircon units
  • There may be dust on the units if they're not properly sealed.
  • Give it a wipe for peace of mind. Would not be nice if it blows out visible dust when you first use it!
  • If the installer did some testing, the aircon may feel damp. Turn on the fan and let it dry out.

Walls
  • Yes, walls. Reno dust goes everywhere. Walls are not exempt from dust.
  • Use Magiclean dry wipes - long enough to reach the top of walls in most HDB flats. I use those bright yellow refill packs from Japan Home - more economical.
  • Freshly painted ceilings are usually fine but can still become dusty over time. Magiclean still the best bet

Carpentry, i.e. cabinets and wardrobes
  • Leave the doors open to air the inside as much as possible before cleaning or the glue fumes will sting your eyes!
  • The insides may look clean but they are not! My white dry wipe turned brown 🤮
  • Given the size of wardrobes, it's more efficient to use Magiclean dry wipes, yes, with the paddle, macam sweeping. I then sprayed the wet wipes with some antibacterial general cleaning solution from Walch, no rinse required.
  • For smaller shelves and drawers, I did the same but without the paddle.
  • If you are paranoid like me, wet wipe with some anti-mould solution. I did this in between dry and wet wipes, and let it dry up first.
  • Drawers can be removed to clean the hollow inside - there's usually a catch under or at the sides of the drawers.
  • Don't forget the doors and ABS strips.
  • Remember to air the cabinet again to make sure insides are all dry.
Besides built-in staff, we also have a lot of loose furniture. For those that we self-assembled, we cleaned the parts before assembling and then did a simple wipe-down.

Doors
  • Like walls, doors are dusty too. Clean like walls.
  • Wipe down the handles which are often touched.

Countertops etc
  • Probably only the kitchen countertop is built in in most homes.
  • Cleaned this multiple times as we kept putting random stuff on it during the cleaning and moving stages. Eventually for food use - and I roll dough on it - so I cleaned like mad using antibacterial wipes.
  • Don't forget the backsplash and under the cabinets above the kitchen counter.

Floors
  • Dry wipe then wet wipe.
  • I even did two rounds of steam cleaning. I knew some parts would eventually be covered by furniture forever and ever so just cleaned max first.

Wet areas
  • Now that the floors are clean, put out a floor mat outside the wet areas and get going :)
  • Dry wipe walls and pipes etc to get rid of dust, then just spray water everywhere to clean!
  • For the toilets, remember that reno staff would have used them. I sanitised them madly coz OCD.
  • Leave the doors open to air dry completely.

Hinges
  • This is more maintenance than cleaning.
  • When everything is nice and clean, oil door and window hinges to prevent rust. Same can be done for cabinets and wardrobes.
  • All you need is baby oil in a cup and an old paintbrush; I have many from the kid's painting days. Tissue is less efficient.

Unpacking

This should take place only after cleaning is all done. 

For us, unpacking is a worse nightmare than packing. While we had the luxury of time to pack over days, we must unpack quickly in order to settle in and get rid of all those boxes.

It's not just a matter of moving things from boxes to cabinets. Nope. Coz I must wipe or wash everything before storing them. Except clothes - see Part I.

Wet wiping is fast enough as they can be dried quickly with a dry cloth. Washing the kitchen stuff took some time as I let them dry naturally...

Cleaning aside, the most important thing is to decide what goes where, i.e. organisation. Lucky we settled that during the renovation planning stage. We still had surprises, like we forgot about space for big suitcases! Eventually found them a home in a non-wardrobe tall cabinet in my room by removing the lowest shelf. We also had more toys than space for toys so some went into the kids' wardrobes.

My goal was to clear the moving boxes so some things were left in a temporary home like kitchen countertops - coz I didn't cook during those early days - as loose furniture didn't all come in before the move. When our new dining table arrive, our old one became a nice storage space for random stuff for a while...

But unpacking the boxes is the last major step. The detailed organisation can be tweaked slowly. Even today, I still move things about here and there...

So that's it. I hope not to move in the next 20 years at least!

Monday, 4 August 2025

No yellow face!

When I was a kid, I often heard this term: 黄脸婆

Huh? Yellow-faced old woman? Sallow face - gosh, sounds horrid.

Well, it typically refers to an old housewife. Why? Beats me! A quick search reveals the following possibilities:
  1. Hormonal changes can cause changes to the skin in an older woman
  2. In the past, cosmetics tended to contain lead which could cause skin pigments to turn yellow; older women were more affected as they were exposed to those products for a longer period of time
"Old" and "yellow skin" aren't words that are flattering to a woman of any age! So this term always carries a negative connotation. But I wouldn't mind it if Sito says that I'm his 黄脸婆 in an endearing manner :) And I do embrace my age.

Still, that doesn't mean I should allow myself to look old or ugly even though I'm *just* a SAHM. Yes, I don't have video conferences, and my interactions with friends are mostly via WhatsApp given that most of us have kiddy commitments.

But Sito sees me - I'm his ex-girlfriend and wife before I'm the mother of his kids. The kids see me - there is no reason I can't be effective at home and presentable in and out of the home too.

So I never dropped my skincare routine. Yes, there have been changes. I dropped cosmetics when I was working from home but I never stopped my sunscreen. Now, I still put on sunscreen on days I don't leave the house. When I do go out, I may even put on some loose powder to even out my skin tone.

From January, I use face masks nearly daily after my evening shower as I bought a few packs from Japan. But I think that's not sustainable as I have to lie down for 10min after putting that on. Some more, I don't think it has made any difference so far. I'm on my last pack and will not buy anymore.

In fact, lately, I've been looking at cheek and lip tints to give myself some colour when I go out. And since the past week, I've been applying facial moisturiser on my perpetually dry lips. Seriously no lip balm works well for me! So far so good. Hope it can help...

Anyway, point is, 内在美固然重要,外在也不可忽略!

Wednesday, 9 April 2025

Moving moving! - Part I

Part I is on what happens in the old house, mostly packing. You can guess what Part II is about.

I lived in the same house for the first 19 years of my life. Then in university, I moved a lot:
  • When staying in college in my first year, I had to move out during term breaks. For Xmas break, I went to a temp room. For Easter break, I bunked in with LS.
  • Other years were great as I could stay in my room for term breaks. At least one summer though, I had to rent a temp room after my lease ended and before I came back to SG.
  • But in my fourth year when I had to do a summer dissertation, I had to move for the summer as the college wanted to renovate the house.
Then during the upgrading in 2006-2007, I moved to Grams' place for a while to avoid the dust - and back again. 

These were small moves. As a student, I didn't have much beyond personal goods, and I brought only a suitcase to Grams'. The idea was to keep it simple. The major moves came with marriage... First was to move in with Sito in 2009 :)

But I didn't expect more moves to come - to Evanston in 2010, back to SG in 2012 but to a serviced apartment for a month before pulling our stuff out of storage back into our home just two weeks before Kai arrived!

After that, we had two big moves - HV to BP, and BP to HV. I'm so done! 

I actually started a one-line draft to this post back in Evanston (!) but I think I'm now more qualified to talk about moving...

Planning

Yes, must plan first! 

1. Decide what to dump, what to move, so that you can go to #2.

This means time for some Konmarie. If a blender is seldom - or god forbids, never! - used, Carousell away. I find it easier to list stuff as free - moves way more quickly. No loss to me since I don't use it.

For the frequently used stuff, two ways:
  1. Buy new ones for the new place and dump old ones on moving day, e.g. TV (not as smart by then), well worn magic mop sweeper
  2. Pack in the last couple of days / last day to bring along on moving day, e.g. kettle, facial moisturiser
Don't need to say which is more convenient but sometimes, no choice. 

For example, we bought new bed frames and mattresses when we moved to BP in 2018 so I set up everything nicely before moving day. Our old bed frame was falling apart and the kids were then on small mattresses. But for the move back to HV in 2023, we decided our sleep gear were still in very good shape so we dismantled the beds three days before moving, slept on mattresses on the floor, moved, reassembled after the move, and cleaned everything to sleep on moving day!

2. Estimate number of (a) moving boxes required and (b) big items requiring separate handling.

You need to tell the moving company so that they can provide enough enough boxes and give the correct quote, usually in terms of number of truckloads. Sito estimated our 2023 number based on 2018 number, plus more coz of accumulation. He also went around the house to look see and his estimate was pretty accurate!

For disposal of big items, movers will usually give a separate quote. HDB dwellers can also tap on town council to dispose of them for free, but nice to give some drink money to the workers who help you :)

3. Decide when to start packing.

Which depends on how much stuff you have and how much time you have. Remember that packing does not happen every day coz there's regular life to attend to as well. Also remember to factor in cleaning time for the new place. For our 2023 move, we started packing things that are less used three to four weeks before moving day coz had to...

4. Find space to store the boxes. 

Best enclosed to protect kids, else isolated enough that the kids wouldn't bother, especially if there's a need to stack high. We had to dismantle Kai's bed and used his room as a store room. He slept on a floor mattress in his brothers' room for a few weeks, oops :p

#3 and #4 can be combined if you decide to get white glove service - the packers will pack everything for you within a few hours max, just a couple of days before the move. You just eye power. I got a quote for this ~ $300-400 but decided to save the money. If you do this, you can go straight to Part II :p

Next, how to pack... 

First, get ready the boxes, tape, marker and pen and paper - need to label the boxes and write down in a list what's in each box to facilitate unpacking.

Remember to take a video for the memories before packing!

Less used stuff

This is easy. Memorabilia, decoration, books. Even if they don't fit into boxes, just remove them from their hiding places anyway. Like our memorabilia boxes at the top of our wardrobes - empty those shelves early and forget about them. 

Btw, don't pack boxes of books and books alone. They're very heavy! Our books took up max a third to half of the box, with lighter things on top. 

I would exclude winter gear here to avoid cardboard smell - see below on clothes and linen. But go ahead and throw in the shoes!

Oh, army stuff - Sito is already done with reservist but otherwise, pack them in one well-labelled box in case really suay kena called up!

Work, school and play stuff

Pare down to the minimum. The monitor can't fit into the box so can use to the end :p All documents, document trays, files and writing materials etc can be packed early. If the kids must lose that last eraser, here's $2 for the school bookshop! 

No need to do drawing or painting in those last few weeks. No need 1,001 toys too. Play with Toy X or just read library books. Remember to return said library books before moving :) Just don't accidentally pack library books into boxes...!

Big Lego structures may need some dismantling and packing into bags before putting into boxes.

Kitchen stuff

No time to make anything fancy while busy with final reno touchups, delivery of goods and packing. In fact, best to eat out or pack food in the last couple of days. So almost all appliances, cutlery and utensils can go into the boxes, save a small pot for comfort food aka instant noodles, kettle and cups. 

For opened goods, put them into big boxes or clean plastic bags before packing into the boxes. Not nice to have cardboard smell in food??! Not all the boxes provided by movers are brand new too...

Don't forget the fridge until it's too late. Must disconnect early to cool down the hot parts, and after the move, must let it stand for a couple of hours to ensure compressor/refrigerant etc has settled before turning it on. That means it's best not to stock up on ice cream, frozen meat etc. From when? Could be from weeks before you start packing so the planning is important!

But what about regular items like dark soy sauce, garlic salt and dried scallops? Get help from family/friends or an ice box that can last at least eight hours*. We pack our stuff in a cold bag and brought over to my in-laws' place that day before the big move.

* More is better. It's at least two hours each before and after, and another four hours for the actual move - weather and traffic may not be kind, worse if you have to dismantle the door and put it back again *.* Speaking from experience...

Cleaning materials

Sito had a good laugh when he was packing some six 3L unopened bottles of laundry sanitiser. Coz I bought a lot during a sale months ago.... Oops...

Anyway, make sure you have enough cleaning materials including laundry powder, toilet cleaner, general wipes and rags for the last days and for cleaning up after moving - need to hand over the house properly to the next occupants. 

Clothes and linen

I cannot put clothes and linen directly in moving boxes. If I do that, I'll have to wash them all over again. Yes, I'm OCD like that. Even if the boxes are new. This is where an old duvet cover or bedsheet is very useful! Heck, I would use my fave duvet cover if that's the only one available!

Just line the moving box with the duvet cover/bedsheet, and dump the stuff inside together with the hangers (if any). Keep them clean between the old and the new wardrobes :) Then just wash the duvet cover/bedsheet. Done!

Also make full use of suitcases - they need to be moved too so might as well put clothes in them, assuming they're clean, else there's always the duvet cover. In fact, I kept bringing clothes over when cleaning up the new house - might as well!

For clothes that should not be crumpled into boxes like suits, movers can provide a clothes rack - they'll hang the suits, wrap with clingfilm and move. It's unlikely they'll provide more than one or two though... If you have your own, they can wrap it up and move for you too - just remember to mention when asking for quotes.

Minimise dirty laundry to bring over by doing your last laundry as late as possible. Don't bother packing dirty laundry - just bring the whole laundry basket over.

Two things to remember:
  1. Prepare clothes and towels for moving day and perhaps the next couple of days, and put them in a suitcase for easy access.
  2. Pack clothes and linen last so they don't get much cardboard smell. Duvet cover is totally porous...
Big stuff

Things that don't fit into moving boxes, e.g. large paintings, furniture, white goods. See above for fridge.

Movers will secure doors to cabinets etc but good to empty them so things will just rock and roll inside during the move. 

Some stuff needs dismantling to fit into the lift or to ensure safety for both movers and goods, e.g. bed frames. Note that dismantling and assembling attract fees. As it turned out, we realised that it wasn't difficult to DIY.

Finally, the move.

This is easy after all that planning and packing. Do a few checks to ensure nothing (big!) gets left behind. Tell the main guy on the ground what to move, what to dump etc.

Usually the movers' truck cannot take people. So someone must be present to lock up in the old house and open up in the new house. I think the latter is more important coz you want to tell movers where to put the various things.

We had 1.5 truckloads so the movers had to return for a second trip. So we left for the new house while they were still packing coz they drove and we took MRT :p I gave them the door code and the access card for the old house, to be returned after the move.

After moving

Not done yet, ok... I went back to the old house a couple of days later to clean up a bit. Lots of dust from the moving, e.g. under the fridge. Also found that the movers did not throw away our old duvets. I felt lucky it was just that and not the old washing machine! After clearing rubbish and checking that the keys etc were nicely laid out for the new occupants, I said a last goodbye and left with the last of my cleaning materials.

And that's it!

Thursday, 13 March 2025

Taking over from the helper - Part II

I started this post back in 2022 when we were still staying at BP.. Finally I'm finishing it!

*********

Following Part I on clean-repair-replace, here's Part II on changing the way things are done.

Cooking - Helper would start preparing at 4.00 or 4.30 pm to get dinner to the table by 5.30 pm. But I want to spend as much time with the kids as possible, so:
  • Prepare ingredients in the morning, marinade them etc and pop them into the fridge - this usually takes much longer than the actual cooking!
  • Bring out the ingredients and set the rice cooker at 4.30 pm
  • Start cooking by 5 pm - I usually takes 15-30 min to cook and serve.
  • Use thermal pot recipes where possible - no need to cook in the evening! Very helpful when we had swimming lessons - I could get the laundry going and dish out hot porridge by the time they were done with showering!
And of course, use less oil and salt! It's hard to gauge how much salt helper used as we used salt water to soak fruits but we used to buy 2L/5L bottles of oil every couple of months! As we happened to start new bottles of oil when moving to HV, I realised that I used only 7L in one year, including deep frying just once or twice.

Laundry - see separate post. While the kids can't help with cooking, this is easy to involve the kids - get them to fold their clothes! Very ugly and full of creases but I don't care coz it's their home clothes :p Anyway I still hang up school uniforms and street clothes. Should teach them how to iron clothes by end of sec school..

Cleaning - I had a task list for the helper, comprising daily, weekly and monthly tasks. Now I know exactly what to do so no need to stick the list on my fridge already. But I have a Google calendar for chores to remind me of less frequent stuff like cleaning the washer or under the fridge.

High-frequency areas which I have changed:
  • Reduce bathroom cleaning from three times a week to twice once a week coz Auntie is busy - and the kids' toilet is where I don't want to go in often! Back in our old place, I even closed up the third bathroom totally - one fewer to clean ✌️ 
  • Change kitchen and hand towels every day instead of I-don't-know-previous-frequency! Nowadays, coz the boys make their vanity so wet, I have to change their hand towels twice a day..
  • Use Robot-kun for the floors, including the balcony in the old house, instead of mop cloths. But I still used Magiclean and even steam cleaning for the yard in the old house coz it got very dirty from the elements.
Also added new tasks: 
  • Steam the floors every month - I bought this to sanitise the floors and coz I heard it helps clean up oily areas. But in the end, I'm very pleased that it cleans dirty grout lines and also the dirt spots left behind by Robot-kun. But I'm lazier after moving to HV, a lot more things to shift to steam floor!!!
  • Steam kitchen accessories with the same steamer but with different steam heads - When I first did this in the old house, a lot of black stuff came out of the tap handle! 🤮 Used it to clean sink drain and hood filter covers too. Again, lazier in HV but my sink is very clean now and I have no hood.
  • Vacuum the aircon units - Helper used to wash the filters monthly. When I took over, I got more regular servicing instead. Then I forgot about the servicing one time and it was too close to school holidays; I prefer to do this when kids are not home. So I washed the filters myself. This is easy enough so I'm still doing it, plus brushing the coils. So far only need annual servicing :)
  • Clean the microwave every week - when microwaving kitchen wiping cloths and sponge, the steam makes the inside of the microwave all wet, which makes it perfect for cleaning! I don't think it was ever cleaned before coz not in the task list, unless there were obvious stains...
  • New for HV: Cleaning the corridor windows twice a year - these sliding windows get really dirty from dust! Sito will clean the corridor side while I handle the inside. Need a bottle spray, a squeegee and lots of rags! The casement windows in the bedrooms always get a wipe every time I change bedsheets.
Hmm, it looks like it's more than changing how things are done but also adding on things to do...

Anyway, hope this info is helpful for families who are looking to take over from a helper! :)

Wednesday, 27 November 2024

No longer airing my dirty laundry

Technically, I used to air washed laundry :p

Having a dryer is a wonderful thing. Really. All the time I used to spend hanging up laundry, shifting the drying racks depending on the weather and checking for dryness was such a waste! 

In our first home, our dryer was stacked on top of the washer. We didn't have a stacking rack, just placed a tailored plank from carpenter on top of the washer, and put the dryer on. But it was impossible to clean the floor under the combo coz it was too heavy to move. When we had to change the washer, it was a nightmare. When we had to repair the dryer, it was also a nightmare.

So for our home now, I decided I want my washer and dryer together. The downside is that our selected dryer model does not allow us to install the door such that it opens in the opposite way as the washer. 

But I already have two Ikea Samla 45L boxes for clean laundry. So I just use a box to hold the west laundry, and pull the box over to the dryer to throw in the clothes. As I like to shake out each item instead of letting each be crumply wet, this setup is much better than the stacked setup where I would have to bend up and down 50 times! Yes, that's roughly the number of clothing items every full load!

These Ikea boxes are really good. Just the right size of a full load of laundry. I bought only one lid though. I put clothes for ironing in a covered box as I don't iron every day now. The box without a lid stacks nicely on the covered box. When I need to mop, the stack of two goes on top of my dryer.

They are also easy to carry. I have to carry Sito's and my clothes for folding to our room to fold. We didn't install the common counter over washer/dryer in our laundry room as I thought it silly to make the machines less accessible for maintenance AND collect dust on the machine!

Yes, we have a dedicated laundry room!


That was the scene after ironing one day. This room gets the afternoon sun so it's perfect, though the direction of the sun alternates every six months.

But when the autumn solstice came this year, I decided that it was too hot when I wasn't drying anything so I put up an extendable rod and hung up an unused shower curtain to protect the machines and my Robot-kun charger.

Come come, let me introduce my favourite room :p

The basin is the biggest, good-looking basin we could find. It's for washing stains off before throwing into the washer. I also wash shoes and Robot-kun parts there. Basically the mud sink. But you know the usual mud sinks look horrible :p Various cloths are hung near or on it - for drying hands, wiping machines, toilet rags etc.

There's a thin movable rack between the washer the wall under the window, where I store detergent, laundry sanitiser, stain removers, bleach for cleaning the washer etc.

The washer looks lower than the dryer coz the roller stands can't take the washer drum vibrations! I can still clean around the washer but at some point, I would need to shift it to clean under it.

The wall rack was useful for me to hang up ironed clothes and also various items to be hung dry, like Sito's jogging clothes (too small a load for the dryer), Kai's school tie, schoolbags and shoes. I can turn the arms so that they go outside the window - great for things that drip and/or need more sun!

The ironing board and iron go into the cabinet on the right edge of the photo, along with other cleaning materials and stores of various stuff which I don't even know where to start describing so I shan't :p The side wall is great to hang up my Magiclean sweeper.

The three baskets in the foreground are for the kids' clean clothes. Each kid will bring his own clothes back to fold. I still hang other clothes for them - that may change if they become more gentle in future, else I fear for my wall rack!

Oh, the small stool is for me to sit on while I move clothes into and out of the machines. And to clean Robot-kun. 

Think this is also the first house tour for our home. Hope to get down to more :)

Thursday, 22 September 2022

Taking over from the helper - Part I

Within the first week of moving into this house, Yang, then 3, used a marker on the wall. Various marks and dents surfaced over the years. I told myself it was ok - we could do some major works when the kids are older and less destructive.

The kids are still kids and as destructive as ever. But I had undertaken some serious works already. Reason? We gave up the helper.

Unless you have a wonderful helper who cleans very well and takes care of things very well, or your threshold for cleanliness is very low, chances are high that there are serious jobs to be done once you take over the house. Sharing my experience in two parts:

*** *** ***

Summary for Part I - clean, repair and replace!
  • Clean if it is possible and not too gross
  • Repair if it is possible and not too gross
  • Replace if it is impossible to clean or repair, or it is gross
I'll go by the different segments of the household to assess for CRR, instead of listing by CRR.

Laundry
  • Iron: Replace - likely scratched. My helper burnt fabric on the ceramic ironing plate and took a knife to it 🤦‍♀️ 
  • Ironing board: Repair - these are usually sturdy and can be washed down. I did :) 
Cooking
  • Frying pans: Replace - I had to change these very frequently as they kept getting scratched! Of course I had to throw out the one she was using. So far no scratches from me 🤷‍♀️ 
  • Cutting boards: Replace - very likely gross. I found a mouldy corner and a burnt (?!) edge. 
  • Knives: Depends on your knife. If it is not made from one piece of metal, the connecting point between the blade and the handle is probably gross.
  • Spatula - Replace - likely discoloured or has some melted plastic part!!
  • Oven toaster: Replace - the insides were all black as helper liked to buy and bake marinated chicken wings
  • Airfryer: Replace - the basket was not cleaned properly and oil etc has all caked up! Tried cleaning to no avail :(
Eating
  • Plates and bowls: Clean - I had to use baking soda to scrub the rims and bottoms of ours. It was gross to see dirt coming off but they were too expensive to replace totally. At least the dirt came off??
  • Utensils: Clean - check the forks especially. Scrub with baking soda and soak.
  • Dining table and chairs: Clean - scrub the least noticed places, e.g. the underside 
Cleaning
  • Rubbish bins: Replace - inside is probably very gross.... I reviewed our Ikea ones here.
  • Vacuum cleaner: Depends on your model. Our Dyson which we bought when we got married, died somehow. I bought a cheap $20 hoover for helper to use. Happily dumped it for a new robot vacuum-mop and a $20 handheld vacuum for non-floor jobs. 
  • Magiclean mop: Clean or replace - I had wanted to replace it as I kept hearing the handle drop off when helper was mopping. But when I tried it, it didn't drop for the longest time 🤷‍♀️ So I'm still using the old one. This is called user fault...
  • Wipe cloths: Replace - don't know what each was used for. I got new ones, each with specific use.
Helper's bedroom
  • Walls: Repair - I had to paint over the walls which were stained grey and brown 🤮 
  • Cabinets: Clean - also de-odourise. Not sure why there was a sour smell inside 🤮 
  • Mattress etc: Not CRR, just throw. No need anymore. I let her take away her bedsheets and blanket.
The simple summary for Part II - change the way things are done. Will link when I finish writing that. Link here.

Wednesday, 17 August 2022

Introducing (and reviewing) Robot-kun

Robot-kun (Robot-君 in Japanese) is our favourite helper whose sole mission is life is to vacuum and mop the floor :) 

Ours is a Xiaomi Mijia 1C. I took some time to read reviews and comments from users on this vs. other Mijia models and other brands, before deciding on it. 

After using Robot-kun for some time, I realised that there are various types of product reviews:
  1. Online ratings. Such ratings may not be about the product itself. For example, when I buy things on Shopee, I see many ratings saying that the buyer has not used it yet. I don't know why they bother to rate *.* I use such ratings to tell me if the seller is reliable, whether the plug is a local plug, etc, but I really appreciate reviews of the product by buyers who have actually used it. 
  2. Professional reviews. I think it's wonderful you can review products for a living, ha! Check out this fantastic review by SRR which links to reviews of other robots as well. I referred to this website a lot during my research.
  3. Customer reviews. Most of the reviews online are #2. If there are comments, I would read them to understand the product from real users who have used it for some time. Coz only time will tell 🎵
Today, I'm going to give a customer review of Xiaomi Mijia 1C.

Why did I buy this?

Good professional reviews. Good price point. Can meet my need which is to outsource sweeping and mopping.

Is this really what the professional reviews say it is?

Oh yes!

What more would I like to know before getting this?

1. Tips on how to map the floor. It took two or three tries for me. I had some difficulty as Robot-kun got stuck in my kitchen where the cabinet doors happened to be just a wee bit taller than Robot-kun. When I pulled it out, it said it would reposition itself and moved around a bit. Then I heard this: I detected a new area and will start a new cleaning path. This means no map *.* Another time, it went to the yard and couldn't come up due to a small step. I had to run Robot-kun again, starting from the dock. I had to close the yard door so the yard had to stay out of the map. I can always bring Robot-kun to clean the yard - it will tell me to bring it home when it can't find its way out :p

2. Get more accessories at the same time as buying the robot. At first, I handwashed the mop pad after every use. That was also the time when I started doing all the housework and cooking. The skin on my hands didn't love me much. I bought a set of three mop pads. While I was at it, I found other parts and bought more filters, sweeping tool and roller brush. Later, I bought more mop pads so now I use two each day - one for parquet in the bedrooms and one for tiles everywhere else. I collect the dirty mop pads to wash with floor mats etc in the washing machine every week. Yes, I have a small pail of dirty mop pads lying around in the yard!!

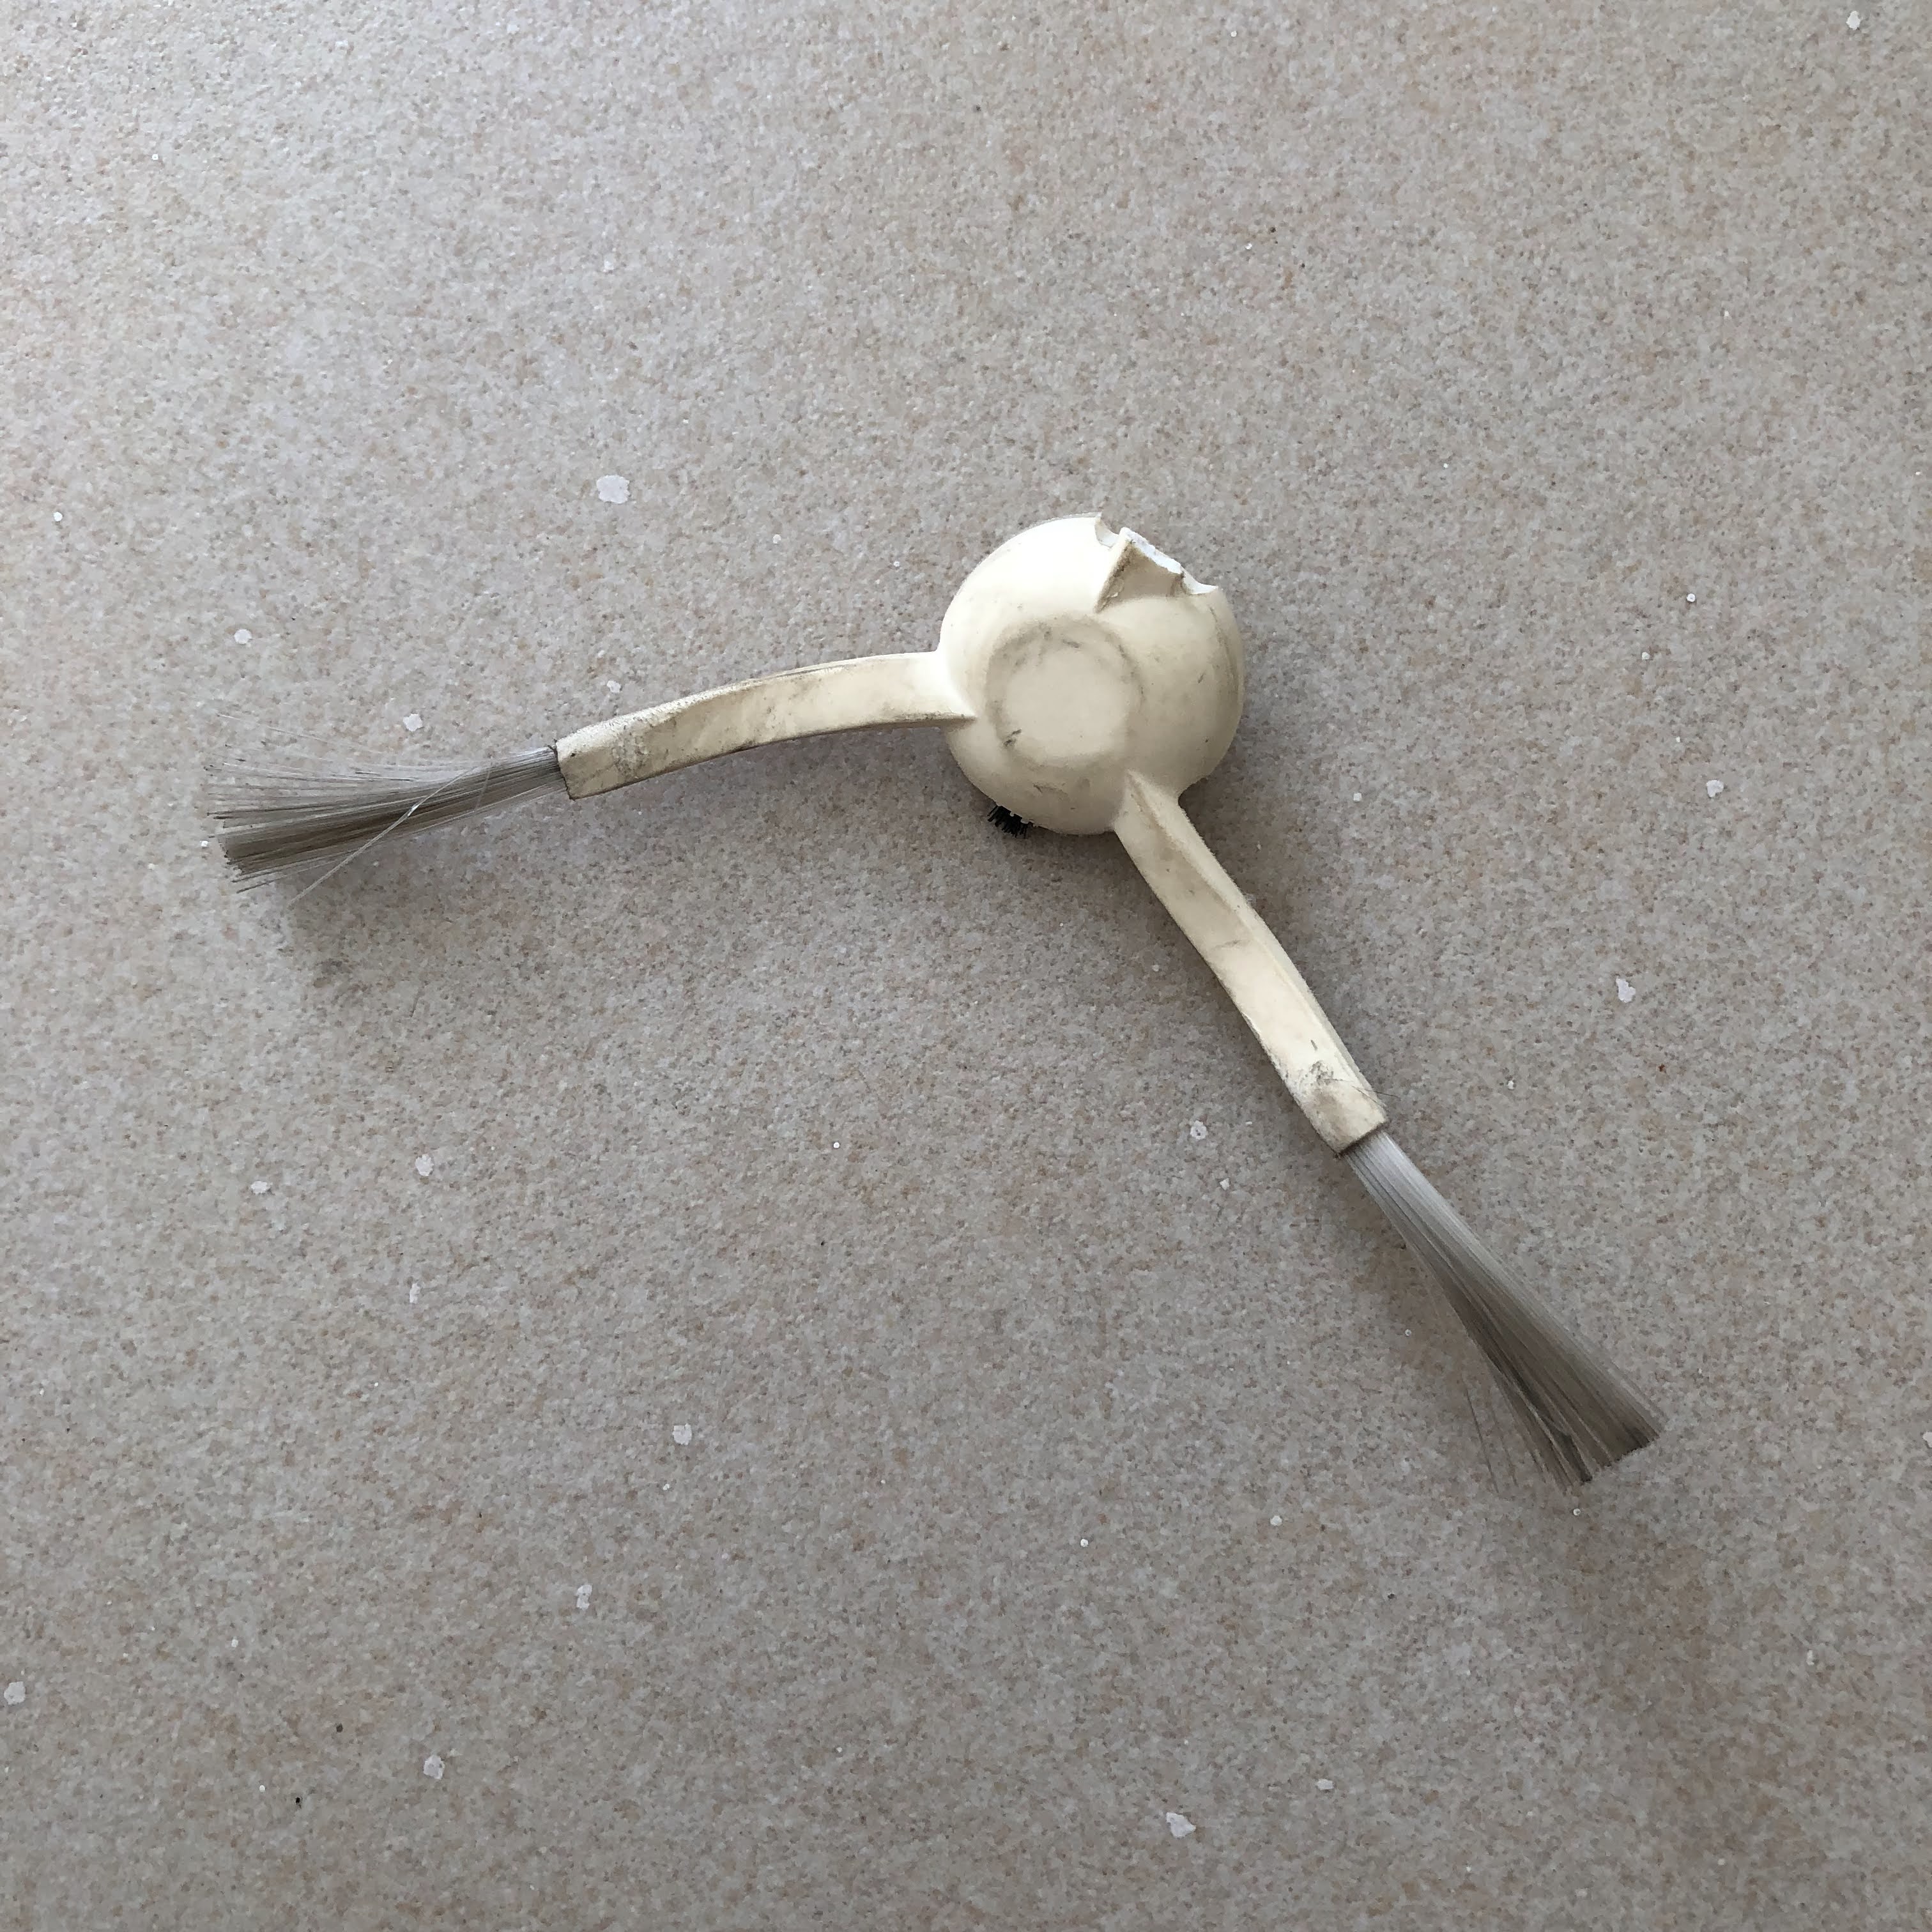
Glad to have spares for this - found the lost arm in the dust box last week. Yes, Robot-kun is a cannibal!!!


3. Grout lines, corners and edges can get dirtier. My grout lines are not even with the tiles and can trap dirt when helper mopped the floor. Same case with Robot-kun but worse as I don't follow it around to wipe up the dirt so it just dries up and leaves grey spots! The same thing happens at corners and edges. Robot-kun turns on itself at corners and dirt can get left behind. Along the edges of cabinets and balconies, Robot-kun will gently hit the edge as it moves, i.e. turn, mop, move, repeat, so it also leaves some dirt behind. No such issues along wall edges. 

Leftover dirt on grout line and corner


4. Area behind doors still need manual mopping. I keep the bedroom doors open for Robot-kun but I don't follow it around so the area behind the doors remain unmopped. Not a big deal as it's not very dirty back there.

5. It takes quite some time to mop. It takes 30 minutes for our four bedrooms and another 30 min for the dining room, living room and kitchen. If I mop myself, it would be much faster. But it's good to reduce manual work on my part! I usually let it clean the bedrooms when I send Monkey to school and iron clothes when it cleans the other rooms.

Would I still get it if I had known more?

I think so. As it stands, I already use a lot of wet wipes for various things. I have never done it myself but I estimate that I would need at least four wet wipes to mop the whole house manually. Not very pocket or environmentally friendly, not to mention having to spend active time mopping it myself.

I might take longer to decide though, as #3 is awful. But since I happened to have a steam cleaner bought separately to sanitise the floors especially the oily parts after cooking and eating, it's not a big deal as it cleans up Robot-kun's trail very nicely. I try to do this once every two weeks.

Anything else?

For my next house:
  1. Cabinet doors must be tall enough to accommodate Robot-kun. 
  2. Any sliding doors must also be tall enough else I would need to mop under the sliding doors every few weeks like what I'm doing now, and this is dirtier than behind bedroom doors.
  3. Marble gum grout the floors to eliminate dirty grout lines situation.
And, some tips on maintaining the machine. I do this once a week. If you vacuum and/or mop more than 60sqm every day, you may need to clean this more frequently.
  1. Put on a mask first. It gets dusty.
  2. Prepare a bag to contain the rubbish.
  3. Remove the dust box, roller brush, sweeping tool.
  4. Use cloth or wet wipes to wipe the body - two big wheels and a removable rotating wheel - and the cavities for the brush and dust box. My white Robot-kun can get scratch marks easily when it gets trapped in the kitchen so I also use a melamine sponge.
  5. Remove hair from roller brush. Be patient if you have long hair like me!
My long hair needs some detangling...


6. Wipe dust off the orange part of the roller brush. You don't want dust to get into your sink.
7. Wipe the roller cover too. I never knew that dust can stick like this!

All the grey/black stuff? Dust!


8. Empty the dust box. Remove the filter and whack it against the floor through the plastic bag to remove dust. Tie the bag before throwing.

One week of dust!


9. Wash everything with water and let dry, especially the filter.
10. Finally, wipe the dock, put back the accessories and dock Robot-kun to charge.

Wednesday, 13 July 2022

Airing my dirty laundry

TL;DR: Wash daily and hang dry overnight!

+ update: Wash full loads only!

For years, we washed clothes on a fixed schedule:
  • Monday: 2 loads - helper, kids
  • Tuesday:1 load - Sito and me
  • Wednesday: 2 loads - kids, bathroom mats
  • Thursday: 1-2 loads - bedsheets; we rotate bedsheet changing schedule for all of us
  • Friday: 1 load - Sito and me
  • Saturday: 1 load - kids
Not counting bedsheets, that was effectively one load per pax per week. 

Now, it's simplified:
  • Daily: 1 load comprising mix of adult and kiddy clothes
  • Monday: +1 load comprising bathroom mats, robot mop pads, steam mop pads, other wash cloths
  • Tuesday: +1 load of all our towels so I can wash at a higher temperature
  • Thursday-Saturday: up to +3 loads comprising bedsheets or Sito's laundry from business trips
Now that the kids are not babies anymore, there is really no need to split our laundry. We have been using the same detergent for quite a while now anyway.

So no smelly piles of clothes waiting for their day in the wash. No need to worry about uniforms not drying on Wednesday in time for Thursday coz each kid has only three sets of uniforms. Best of all, we don't need many clothes coz the shirt worn on Monday is back in the wardrobe by Wednesday! 

The last point is most useful for underwear! We used to need so many pairs coz each kid wears two to three each day. Accumulating that many pairs for washing day means we need about as many pairs on standby in the wardrobe. So I started throwing out underwear that were too worn - they end up in the storeroom as disposable cleaning cloths for major clean-ups.

In the past, helper would start the washer only after kids had changed out of their pyjamas so the clothes were kept much later in the day. When I took over, I set a timer for washing to finish up by 6.30 am or so, when I would be home from sending the older two to the bus stop. Some clothes would be dry by late morning and thicker ones in the afternoon. This means I still have to fold clothes when kids are home. 

Over the June holidays when I needed to maximise time with the kids in the afternoon, I started running the washer right after dinner. Yes, I would have laundry chores hanging up the clothes later at night, but I wake up to almost dry clothes! On days when I have additional loads, they can be done in the morning and would usually be dry the same day. 

Now, where's my efficiency medal? :p

Update 9 Nov 2022

So some months into daily washing, I thought that I wasn't maximising the washer. So I decided to wash only when there's a full load. This works as well. Often, I still wash at night. But there were times when I wash after breakfast when the kids throw in their PJs, or mid afternoon when the kids throw in their school uniforms. So I ended up with fewer loads per week while still churning the laundry, yeah!

Wednesday, 29 June 2022

Is afternoon sun really that bad?

This has been a wonderful week, and not just because term 3 has started (which is great, btw!); after all that rain, I'm welcoming the sun back into our lives!

One of our duvets sunbathing, cover and all


We didn't know that three of our four bedrooms would get the afternoon sun (or 西照 in housing speak) when we bought this house. When we got the keys and saw the sun, we had the windows all tinted. Blackout curtains definitely but those were more for the kids' nap time as they were all still taking afternoon naps at that time.

When we moved in, we realised that it got really hot after 3 pm as the sunlight goes about 1 metre into the bedrooms. 

Solution? Aircon. But this doesn't affect our electricity bills:
  • The kids napped with aircon with or without afternoon sun.
  • Now that the kids are not napping, we are also not in the bedrooms in the afternoon. And I'm at home the whole day most days!
  • Until WFH happened as The Hub converted a bedroom to his office. But even if there is no afternoon sun, he will need aircon for WFH.
So afternoon sun doesn't affect us negatively. In fact, I love the afternoon sun! It's usually windy so laundry can dry even without the sun. But it's really nice to smell the sun in the laundry, you know? The kids' school shoes get a good wash during the major school holidays, and nothing dries them better than the good old sun. 

My fave is to sun pillows and duvets - these are difficult to wash but why wash when the sun is free to use?

Just like today. I usually sun pillows and duvets when I wash the bedsheets. But since it's so hot and sunny today, let's smell some sun when we sleep tonight :)

Monday, 9 May 2022

Let's recycle!

Somehow, Monday is recycling day in our household. Maybe it's because the kids are home a lot more on weekends and drink milk like it's water *.* Every week, we drain three to five 2L cartons of this milk.

Seems that recycling is quite big these days? Keep seeing the CNA green plan on TV. Well, Auntie started when I was a kid in the early 1990s ok, with the "I'm a young environmentalist" badge, woohoo!

Then in my uni days, when I discovered that my lawyer friends printed their cases on only one side of the paper for ease of reference, I took their discarded printouts to use the other side to do my maths tutorials instead of using fresh paper.

In my master's year, I rented a room in a house instead of a college community space, and found that the town council provided free recycling boxes so I wrote in to get one for our kerb side :) And that summer, I was in Germany and found recycling bins everywhere. Back then, they weren't as common in Singapore. I was happy to see more and more of them in the past 10-20 years!

Now, there are those big blue recycling bins in every estate. We used to only bring down cardboards and boxes on an ad hoc basis, and worksheets etc at the end of the school year. After I took over household management when we gave up the helper, I bought a recycling bin. So started our Monday recycling.

Truth be told - I was looking for a rubbish bin coz the old one was really gross... And I found these Hållbar bins in Ikea:

10L rubbish bin stacked on 22L recycling bin


Regular NTUC Fairprice bags can fit into the 10L. I fill one or two bags every day, for a household of two adults and three kids. A rectangular ring holds the bag in place very well - in the past five months, I only had to clean the inside of the bin once coz the kids dump pencil shavings all over such that they fell in when I removed the bag *.* 

I prefer this to our old step pedal. I just leave the lid open the whole time since rubbish gets dumped daily so there's no smell. The stacking seems to help prevent pests - no ants or lizards (!) in our rubbish bins for five months now!

I don't use a bag for the 22L bin because recycled stuff should be dry! I let milk bottles air dry on top (where the rubbish bag sits in the picture above) after rinsing them. This size can fit four 2L milk cartons, with space left for other things like a 10-egg egg tray and trash mail. 

There are two lids for this side - I can slide the milk cartons in through the half lid (hidden by the rubbish bag!) instead of removing the 10L to open the full lid. There's also a handle which makes it easier to carry the box downstairs or just shift it to clean the floor.

I first saw these in white but when I was ready to buy, they had phased out the white. But these grey bins also look very nice! :)

Shall end this with two tips:
  1. Pack small stuff together in a bag or old envelop to make it easier to move them from your own bin to the blue recycling bin
  2. Look here to learn what can be recycled (and what not!) in Singapore - remember, trash belongs to the green bins, not the blue recycling bins!
Have fun recycling! :)

Wednesday, 6 April 2022

Cleaning the drain for the first time

I give our bathrooms a wet wash at least once a week, down from three times a week when we had a helper. Yup, not my favourite chore! But I do spot cleaning all the time, and the kids' bathroom often get more wet washes thanks to boys being boys.

Anyway, I keep a trusty Ikea squeegee in each bathroom to sweep water down the drains. Each bathroom has two drains: one in the shower area and one under the basin cabinet. 

Recently, water pooled over the drain under the basin in my bathroom. Uh oh, blocked :( If you discount all the cleaning I had to do after helper left, this was my first challenge. 

That day, I really didn't feel up to clearing the blockage, as I was still tired from the latest kiddy COVID infections. So I swept the water into the bathroom drain instead. 

The next day, I pulled up my sleeves and found three layers in the drain cover. I cleared out the top two layers. 

Wipe debris off the top and lift up with the nail of my thumb


The shadows are due to the cabinet right above the drain. Mental note to self: for next house, don't build a cabinet above a drain if possible; else, no cabinet.

Another job for my poor nail; should have grabbed a screwdriver


Brought the second cover to scrub and wash at the yard where I keep a "dirty" cleaning brush. Not too gross considering it was probably rarely/never washed in four years!

But I stopped at the third layer. To be honest, I was scared.

😱

What if I uncovered very gross stuff? I mean, I had cleaned poopy bums with my bare hands but this is a different kind of gross....

Especially when I can't see the opening, which faces inward


It took me three days before I finally got down to it. What would I find??

Just this! It's all clean here coz else it's just too gross to show :p


Turned out there was quite a bit of wet dust bits stuck to the flap so it couldn't open freely to let water through. Nothing a good scrub couldn't solve, thankfully.

The drain hole is all black - I tried to not look far; just wipe the rim with a paper towel and close it!


I tell you - I felt invincible after that, haha!

But no, I don't wish for greater challenges, especially those involving living things!

Friday, 18 March 2022

When the kids are C+

I did not expect another C+ in this household so soon. In fact, make that three more C+.

Yu tested C+ exactly one month to the day I tested C+ in February. We had him don a mask as soon as we knew he was a close contact but the siblings play together too much which is a good thing during normal times...

So in addition to earlier tips on surviving home recovery for adults, let's see some learning points from my current experience... 

*** *** ***

1) If a preschool kid gets a health risk notice, he/she is probably already infected. Just look at how these monkeys wear their mask. They don't wear them properly. And Monkey told me they don't nap with their mask. Btw, two thirds of his class have been infected in two waves; he missed the first wave coz he was home with me when I was C+.

And look at the timeline for HRN:
  • Tuesday: C+ kid last in school
  • Wednesday evening: School alerted parents
  • Thursday: HRN issued
For a C+ with TraceTogether, the timeline varies depending on whether it's the token or the app. In our experience, the token was collected one day after being tested.

2) If you get C+ without knowing why, your close contact probably did not get tested and hence no contact tracing was done. I did not plan to get the kids tested as their symptoms were manageable and I had enough medicine at home. But Kai was dizzy for some two hours and puked on Day 2 of our home test. So I brought him to the doctor. Token was collected on his Day 3 - um, too late for his close contacts?! *.* But ok la, school holidays break for him.

3) If a preschool kid gets COVID, his/her siblings are probably going to get it too if they are close - play together and/or sleep together. Coz it's too late by the time you put on the mask, even if the kids can wear mask properly. See points #1 and #2.

4) Don't bother isolating the preschool kid. First, these monkeys can't be left alone unless TV is a huge draw. Second, you still need to wipe their cute bums. Third, see point #3.

Better to isolate the healthy adults and any vulnerable persons. 

If everyone turns C+, it's a party! Haha! No need for isolation. Just need the right apps to make sure food and grocery supply is not disrupted.

Managed to isolate Sito in time; he remains C-. As I just recovered, I probably have some level of immunity. Have been sleeping right next to Yu and breathing in his sweet baby smells and sweaty hair, and still C-. 

5) Even if isolation is for the healthy, i.e. the healthy wears mask, the C+ should also wear mask. Yes, these kids don't wear mask very well and viruses can escape but the mask is still very useful for catching cough and sneezes and preventing germy droplets from landing on walls and toys etc. Also get them to wash hands all the time.

I'm doing everything I could to minimise disinfection work later...

6) Working parents in particular need good entertainment options at home. Kiddy TV ends by noon! Not the best nanny but it works. This non-working parent still needs to clean toilets...

Alternatives: 
  • Toys. Good opportunity for them to learn to pick up after themselves, if they can't do so yet. 
  • Books. Try the app if you run out of physical books. Our library has a good store of ebooks for kids. Monkey downloaded a lot while I was not looking! 
  • Board games. A new discovery late last year and a very useful one. They even played Scrabble at one point. I took the chance to pull out an old dictionary - check this book instead of asking me :p
  • Nintendo and YouTube Kids are fail-proof. On the TV so you save their eyes!
With little hands touching everything and little faces coughing everywhere, point #5 is very important!

7) Order tingkat which is way cheaper than food delivery. For four of us, I order dinner tingkat for two pax and cooked my own rice. This was meant to relieve cooking during the school holidays as I intended to bring them out etc. Became isolation food @#$%^&*

At $13.40 per meal, it is cheaper than the cheapest delivery I ordered - cai png including rice and delivery fees at $18. Other options are way more ex - $25 for Hainan Story, $35 for Macs, $45 for Dian Xiao Er.

*** *** ***

The kids are still C+ today, which is Day 5/6/7 of their first positive test. Hoping for them all to go negative this weekend!

Wednesday, 23 February 2022

You can call me AUNTIE, really

Update 12 Nov 2024

Well, busy me neglected this "new" blog within a few months... So I transferred all my posts over here and deleted that blog! Check out my auntie page for details.

But not deleting this post la... 


*** *** ***

That ☝ is the name of my new blog. Not that I'm too free... But I can finally write about my job leh, haha! And I have itchy fingers. Must type. One day, I'll also find a way to maintain MS Excel skills too :p

I'll still continue with mf-ism to document our daily life and random stuff. One day, maybe the kids will be interested to read about, say, their birth stories? Hoho!

Anyway, check out:

You can call me AUNTIE

for auntie trivials and tips on the five Cs of child care, coaching, cleaning and cooking, home improvement, household management and product reviews.

This is me doing one auntie thing, on the day I was exposed to COVID - most of these muffins were dumped! :(


Surviving COVID-19 home recovery

 I came down with COVID-19 :(

As Sito was out of town, I was the only adult at home. Luckily, the kids are old enough to do some things independently and even help me during my home recovery. Two KPIs were met: (1) The kids stay alive; and (2) they did not catch COVID from me. 

Here are some tips to help others in similar shoes, i.e. single parents of (semi-)independent school-going children and with mild symptoms on home recovery.

*** *** ***

Put up safety barriers

To be honest, if you get COVID from the kids, most likely you are all going down coz they would be infectious before showing symptoms. But if you're the first and you know about your exposure to COVID early like me, there is a very good chance that your family won't get it from you if you do this first step right. Even if you don't know about any exposure, it's best to barrier up at the first symptom and hope for the best!
  • Mask up: While a surgical mask would do well for those who can stay put in one room the whole time, take it from healthcare personnel and wear N95 mask if you need to step out, e.g. toilet run. When sleeping, switch to a surgical mask for comfort. Yes, mask up even when sleeping, especially if you cough and especially if the kids may find you in the middle of the night! If the kids are willing, have them mask up as well.
  • Wash hands often: After touching face, especially nose and mouth. I washed hands after wiping tears too (I tear easily and I was watching drama, i.e. can get emo). Use soap if possible; if you don't have hand soap, shower soap should work too! 

Download instructions to kids

This could be done using the phone if the kids are able to pay attention. Minimise face-to-face interaction. For reference, my three kids are aged five to nine.

Sample instructions:
  • Do not go into my bedroom, my bathroom at any time
  • Stay on the sofa when I need to come out of my room; do not run to hug me!! Double hugs when I get well 💕
  • If you feel unwell (sore throat, cough, body ache), tell me immediately - may need someone else to bring them to the doctor
  • Take ART every day to make sure you are negative before going to school - may need to help them transfer stick to the solution; just stay at arm's length with proper barriers in place

Pass money to kids

They will need cash - even if you grab food all the time, they need cash for recess. Or tell them where to get the money. No cash on hand? See next point.

Inform family and/or friends

When you need help, you need help. Get cash, get ART kits etc, for emergencies. Better to alert them early so it's easier to activate support.

At the minimal, let frequent visitors that they can't visit lest they get exposed!

Identify essential activities you need to do

Remember - the more you do (i.e. touch), the more you have to sanitise later! 

Examples:
  • Laundry is an essential housework for me. I have never taught the kids how to use the washing machine or iron clothes so I had to do laundry or they would run out of uniforms.
  • Toilets are not essential. Poop stains can wait. The exception is if you as a C+ patient shares a toilet with them - must sanitise after every use!
  • Cooking is not essential. Order tingkat or grab food. Distribution of food may be essential if the kids can't, in which case, safety barriers are crucial.
  • Even engaging kids is not essential. One week of TV and no learning won't hurt anyone but COVID will.

Demarcate activity areas

Obviously, I could not shut myself in my room the whole time since there is essential things that the kids can't do. 

Besides my ensuite bedroom which became out of bounds, I forbade them from entering the study where I had my meals. I also did not enter the living room area where they self-entertained on the TV.

Let the kids help where they can, with safety in mind

It's amazing what they can do if we let them :)
  • Go to school: If the kids can go to school safely on their own, great. If not, engage help or just keep them home. My older kids have been going to school on their own but they crossed the road on their own for the first time when I had COVID. I had to remind and nag at them to wait, wait and wait for the green man, and not be gan cheong to cross if they saw their bus coming!
  • Self-entertain: Yu is too young to go to school on his own. I did not get the grandparents to help send him as there were many cases in his school as well. And he can really self-entertain. I just needed to check on him once in a while - I peeked at him instead of calling him so he wouldn't rush over. These kids cannot do emergency brake!
  • Buy and collect food: This is possible if it is safe to get to the food. After all, they buy food for recess. My kids can buy pizza, bakery buns and their must-have milk. Not all pants have pockets so a wallet on a lanyard or wrist band etc would be useful. Remember to pack TraceTogether tokens for places where they might be needed, e.g. supermarkets. For other food, I had them delivered or got the kids to collect them. 
  • Collect ART kits: We were running very low as two kids had to take ART daily before going to school and I also had to test after 72 hours. It was easy to do and there's a video on this on YouTube. But remember to check for stocks first!
  • Top up EZ Link card: Unfortunately, I forgot to top up one card when I was supposed to. Luckily, Yang was observant when I topped up a card with him so he managed to get it done. 
Sanitise after COVID

Remember to sanitise everything you've touched and everything that droplets from a cough may have landed on when you're recovered! Water, household disinfectants and alcohol wipes are my friends.
  • Start with high-frequency things and areas: For me, it's my bathroom coz during emergencies, the kids couldn't wait for their brothers to finish with their toilet...
  • Wash with hot water: Linen including the mattress protector and soft toys are thrown into the machine and washed at 60 degrees. 
  • Wipe down with disinfectant or alcohol: Bed frame, bedside table, toilet, table, laptops and the grossest of them all - the mobile phone. Don't forget the things you use on auto-pilot mode, like moisturiser and lip balm. For lip balm, as it came into contact with my lips, and there would be nothing left after wiping off a couple of layers off all 3mm of this stick, I dumped it.
  • Sun things that can't be washed: Pillows, cushions, soft toys which are too big to wash, etc
  • Dump: I threw out the muffins I made and froze the day I was exposed. If you didn't finish a pack of chips while you were positive, I highly suggest you dump it.

I just found guidelines on cleaning for households on home recovery - check them out too! I didn't use gloves but I did continue to wear my mask. Don't risk reinfecting yourself...

*** *** ***

I also wondered... What if my symptoms weren't mild? What if I had to be hospitalised? What if the kids are too young and need constant attention? What if the kids cannot help around the house? What if I passed COVID to the kids?

There is only one solution, i.e. outsource, be it ordering everything - MSG and all - and/or activating help from family and friends. Close one eye and ride out the storm!

On the other hand, what if Sito was home? Need to do some preparation like bringing his stuff out of our room, let the kids sleep together, have him sleep on the extra bed. But after that, I could have self isolated in peace haha!

Wednesday, 16 February 2022

Refreshing my ironing board

There were many things to replenish when our helper left. Took two trips to Ikea in one week - first to Alexander for the big stuff as I'm familiar with the place and it's easy to just pop my boxes from the trolley to the taxi; second to Jurong for the small stuff not available at Alexander.

In between the two trips, I bought an ironing board cover from NTUC. I knew that I would have to get a new iron because helper scratched burnt fibres off the ceramic soleplate with a knife!! That was some time ago but I didn't bother changing it since it was still working and I knew I wouldn't keep her long. But I didn't realise until after my second trip to Ikea that I had to get a new ironing board too! 

The army towel acted as a dust cover but also prevented me from seeing the truth about the board whenever I went into the yard


Some weird stained on the iron rest


The cover under the polka dot cover was disintegrating


I didn't remember why I had two ironing board covers, haha! Probably coz I thought one was not thick enough so I pulled the new one over instead of replacing the old scorched one.

A quick search showed that the cheapest ironing board is from Ikea. But it doesn't have a stand for the iron. The one with a stand is double the price. As a would-be SAHM then, I didn't want to spend that much. I also didn't feel like a third trip to Ikea after going there twice that week already...

So I checked the board again and turned to Google for advice. Finally, I decided not to buy a new board at all since the frame was quite sturdy and usable. Instead, I embarked on a messy project.

First, I stripped the board cover by cover. And I found black dust on the cover below. Turned out that the polka dot cover was also disintegrating. I should have expected that?!


As I removed the second cover, I wrapped up the black dust. But the wind started to work against me - some 80% of the lining underneath came off; the rest got stuck in the metal grooves and dropped off one by one with the wind!


Brought the naked metal frame into the bathroom to wash and all the rust started to come off. I had to hurry to wash the rusty water away in case it stained my bathroom tiles.

Then it was drying time. Came back some hours later to invert it and more rusty water came out :(

I had two ideas about the iron stand. Cloth + silicon pad, or aluminium foil? In the end, I couldn't bear to (a) do more sewing, and (b) sacrifice a silicon pad for the oven so I went for foil. I crushed the foil before opening it up to wrap so as to minimise tearing. Not very pretty but it works and is easy to clean and replace :)


After putting on the board cover, my ironing board is good as new, yeah!

I have been using it three times a week for the past month odd. The foil is keeping up well. A couple of connecting parts tend to peel off so I just press them back on. I reckon I would only need to replace this once or twice a year.

Friday, 11 February 2022

Fancy a toy hammock?

"A toy hammock is where toys get their rest after accompanying you the whole night..."

I grew up among mostly girls, and I remember a dear cousin with many soft toys. So I always thought soft toys are a girly thing. Then a male classmate in JC said he liked soft toys. Thanks to that, I didn't find it strange to see how my little boys love their soft toys! But they love them too much - we have too many of them...

They were all over the beds. At one point, the kids threw them everywhere at bedtime so we wasted precious time picking them up before they could settle down to sleep. In the middle of the night, these plushies inevitably got pushed to the floor.

The next morning, my helper would pick them up and place them on the beds. But somehow, she would put one or two on the wrong bed and at bedtime: MAMA! Where is my Ninja turtle?! MAMA! This is not mine!

I needed a storage solution. Was googling and saw toy hammocks - too many to link here; just google it yourself. I was pretty taken with this idea - storage off the floor and bed! But I wasn't about to splurge on these or find some cute cloth to sew.

One fine day mid last year when I was packing stuff at home, I found a stack of bolster covers - they came with our bedsheet sets but we never used them; our one and only big bolster was gone over 10 years ago. I didn't know why I kept them but I was glad I did! They became our toy hammocks!

The first attempt took some three hours over many days coz I’m such a noob at sewing. Still remember that I damaged my mother’s sewing machine back in home economics class.. This time, I stitched all six toy hammocks by hand. Such a nightmare, haha!

So I'm putting together a mini tutorial which can hopefully help you:
  • keep soft toys nicely
  • make use of otherwise unused bolster covers
  • 借前车之鉴 and spend less time on this little project!
PS: This is not a sewing blog so don't focus on the ugly stitches :p

Here we go!

*** *** ***

Going from this:


To this:


Tidy bed and toys, and minimal dust on the toys they hug to sleep, woohoo!

Step 1: See if this suits your bed

I'm not sure if bolster size is standard. The length of my bolster cover is just nice for our super single beds so this might sit lower for single beds. For even wider beds, you'd need a longer bolster case or use longer drawstrings.

My beds also happen to have a tall "headboard". Not sure if you call that a board when it has holes! So see if there is space to tie the toy hammock to the bed.

Important note: I wouldn't recommend placing this in a baby cot as there is a risk of suffocation! Or in a bed with a young child or a child with neuro disorders etc. You get the idea. Be safe.

An alternative is the foot of the bed so that the toy hammock rests on the outside of the bed.

Once you've ascertained that this would work for your bed, read on!

Step 2: Remove most stitches on the bolster cover

Keyword is MOST. 

There is at least one seam along the length of the bolster cover. It probably has both interlock and running stitches. We want to remove all the interlock but most of the running stitch, leaving the two sides intact.

I was lazy and removed both the overlock and the running stitch at first. The overlock needed quite a bit of plucking by hand after that. So many short threads flew around!


Then I removed the running stitch before removing the interlock. I found that easier. For the running stitch, just rip it like in the above picture at intervals and pull out lengths as you go along. The back will drop off on its own.

For the interlock, I did this - which was messy again!! But more manageable.


Later, which was unfortunate for me, I realised there are many videos on YouTube showing efficient ways to remove interlock stitch :(

Anyway, the opened seam will be the opening of the toy hammock. Trim off loose fabric threads from the raw edge if necessary.


Step 3: Hem the opening

There are two sides to hem. Remember we left the seam at the sides intact? Choose one side to start. You will need to fold the raw edge such that the folded side aligns nicely with the intact seam. Then, hem the edge all the way from one end of the bolster to the other.


When I was in secondary school, we had to fold and iron the hem before sewing it. I'm no longer in school :p so I just folded the edge - twice, so as to hide the raw edge - and used my nail to "iron" it by scratching across the folded part. Learnt this nail trick from school and loved it! But note that it does not work for all fabrics; cotton is fine.


The tiny holes are a good guide to follow when folding. The cloth may also be quite folded after removing the stitches - see picture just above.


I used a lazy blind stitch - you can still see a bit of the thread on the right side, hence lazy :p Ugly, but it works! You can use a machine too. Done in two minutes!


When you reach the other side, merge the hem with the original seam like at the beginning.

Step 4: Secure the sides

You know kids can be very rough. Who cares that the mama has spent hours on it?!

So I stitched a few times over the part where the seam meets the hems like this to strengthen it - see the tiny white vertical line below. I used to do this for the pleat of my skirt back in JC.


Step 5: Check the drawstrings

Four of my six had drawstrings with two endings. The other two had drawstrings in one loop. For those two, I had to cut the drawstrings so that I could tie them to the bed later. Simple job to cut and hem the edges.

And we're almost done! You should have a rectangular thing with three holes - two existing ones and one made by above steps - held together only at the sides as circled below.


Step 6: Tie to the bed

If your bolster case has never been washed, it may be wise to wash it first before bringing it to kiddy space!

How to tie depends on your bed. Ultimately, make sure it is secured to the bed with no chance of it falling on the kid. Show you how I do it:
  1. Tie a half knot first - this is important if you don't want your toy hammock to tear! Not kidding, happened years back when Sito was changing bedsheets 😅
  2. Loop each end of the drawstring horizontally, in opposite directions
  3. Loop each end under the horizontal loop and bring them up vertically to tie above

Step 7: Introduce it to your kids + bonus

Tell them this: "A toy hammock is where toys get their rest after accompanying you the whole night..."

See if it encourages them to keep the toys themselves too! :)

*** *** ***

Hope this is useful! :)